
A cheap first attempt is useful only if it gets you closer to the video you want. Spending less on a model and then correcting the same edit ten times may save neither tokens nor time.
In Tellers, you can optimise both sides of the workflow: choose how much the agent thinks and how quickly it responds, give it reusable notes about your footage, and approve visual ideas before paying to animate them. You can also decide that your time matters more and keep the faster, more capable settings on throughout.
Here is how to make that choice deliberately, track what you spend, and avoid repeating work. The controls and screenshots below reflect Tellers as of 16 October 2026.
Start with your priority: a smaller bill or less waiting
If you are exploring on a limited budget, start with ECO intelligence, use inexpensive generation models, and approve a storyboard before generating motion. Choose Slow response speed when you can tolerate a longer wait.
If you are editing professionally, Ultra Fast response speed and HIGH intelligence, paired with a generation model you trust, can be the more pragmatic default. When your working time outweighs generation costs, keeping the creative process moving is valuable. You are allowed to enjoy the process without optimising every call.
Both approaches benefit from clear briefs and organised footage. The difference is how much you want to spend to reduce waiting and intervention.
Understand what is consuming your tokens
Two parts of a Tellers task can consume budget:
- The agent: the language model reading the conversation, reasoning about the edit and deciding which tools to call.
- The tools: operations such as analysing footage or generating images and videos.
Those costs respond to different choices. A less expensive intelligence setting reduces the cost of agent work. Asking for fewer generated shots affects tool usage. A cheaper agent can still call an expensive video model.
Inside a chat, type /cost-breakdown to inspect the split. The panel shows Agent, Tools and Total, with expandable tool and model calls.
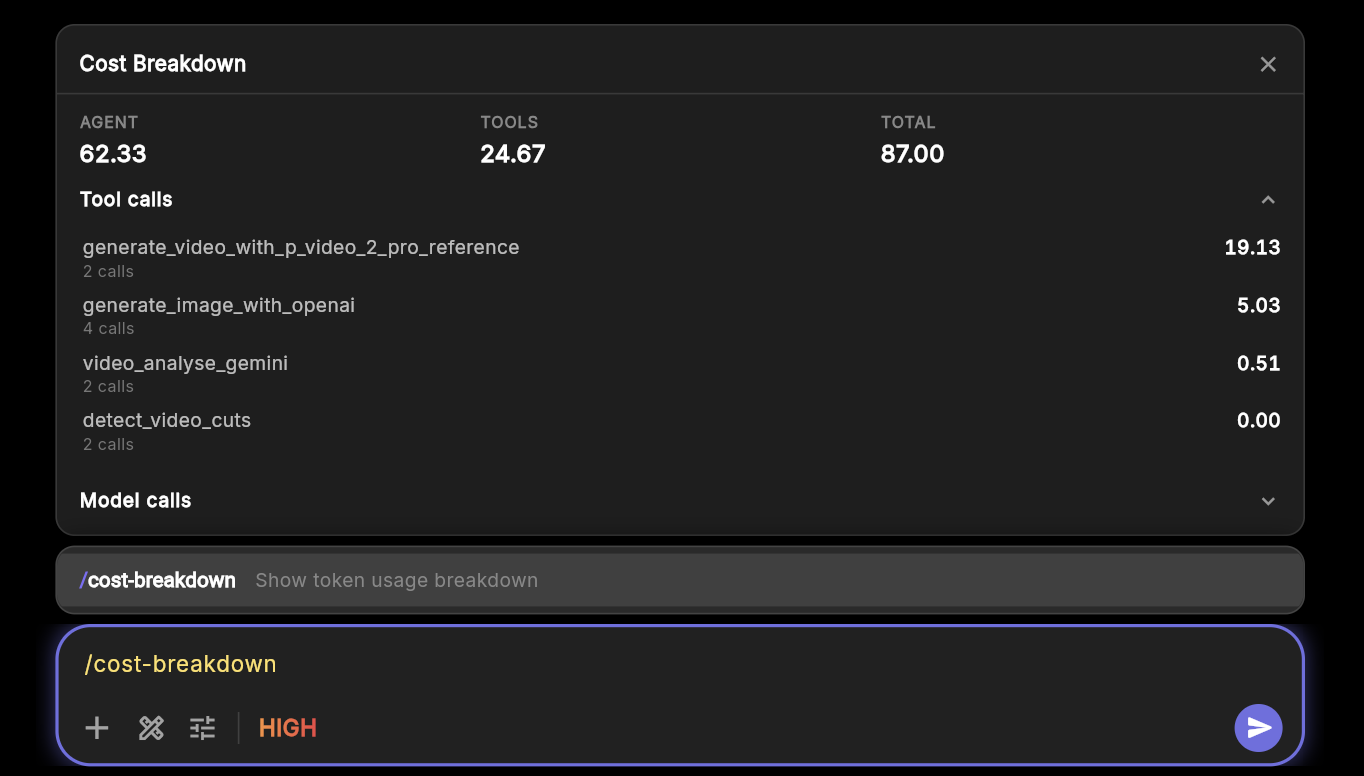
Use the breakdown to diagnose your own chat. The values in this example are not a price estimate for your next video. Open the image to inspect it at full size.
Check it after a meaningful stage: the first rough cut, a storyboard or a batch of clips. If agent work dominates, look at the intelligence setting and conversation length. If video generation dominates, look at the number of shots, variants and regeneration requests.
Choose intelligence and response speed separately
The intelligence menu offers four levels:
| Intelligence | Model family | A practical starting point |
|---|---|---|
| ECO | Luna | Straightforward edits, clear instructions and inexpensive exploration |
| LOW | Sol | Routine work that needs more capability than ECO |
| HIGH | Sol | More demanding editorial decisions and multi-step work |
| MAX | Astra | Difficult planning or a task that remains unresolved at lower levels |
These are starting points, not a rule that every complex edit must use MAX. Try ECO when minimising cost matters. If it handles your format well, stay there. If it repeatedly misses the same requirement, move up with a clearer brief.
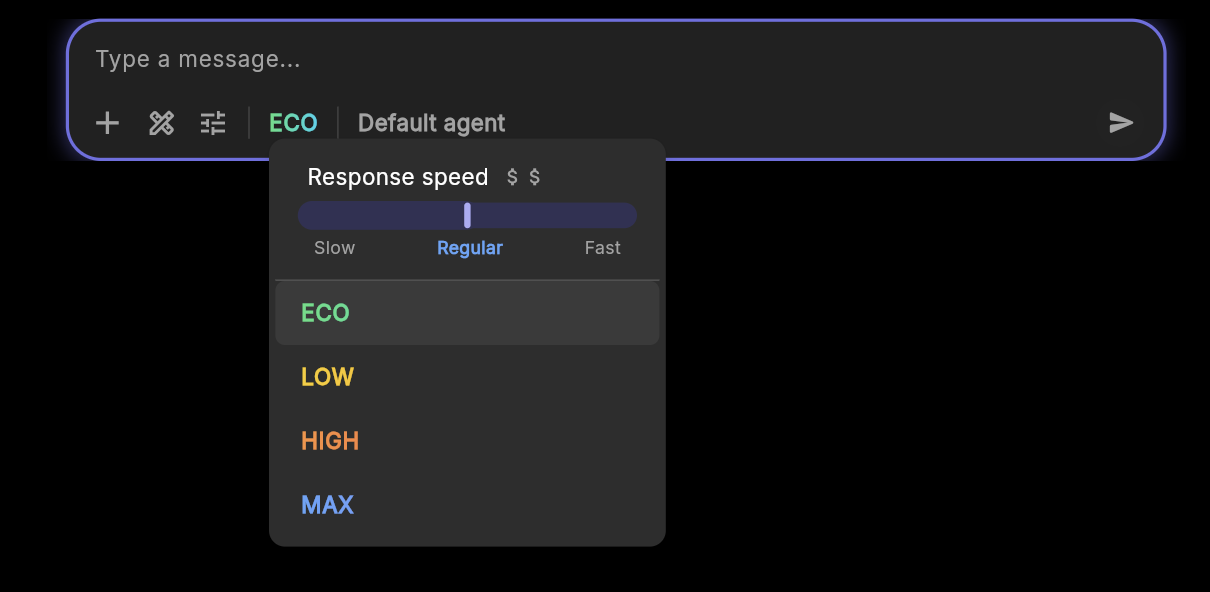
Intelligence and response speed are separate choices. This screenshot shows ECO selected and Regular response speed.
Fast and Ultra Fast prioritise faster agent responses at a higher cost. They are useful when you are actively reviewing and iterating. They do not make every external video-generation operation run at the same speed.
Slow makes the agent’s LLM tokens 50% cheaper, in exchange for potentially much longer waits. It can also fail in some cases, so use it for work that can tolerate delays and another attempt. The reduction applies to the LLM portion, not every charge involved in making a video.
For an interactive client session, paying for faster responses can make more sense than waiting. For a non-urgent preparation task, Slow may be a reasonable trade.
Set a token limit before starting
Open the chat settings and choose Token limit before launching a new task. Set a numerical allowance that suits the work instead of leaving it on Unlimited.
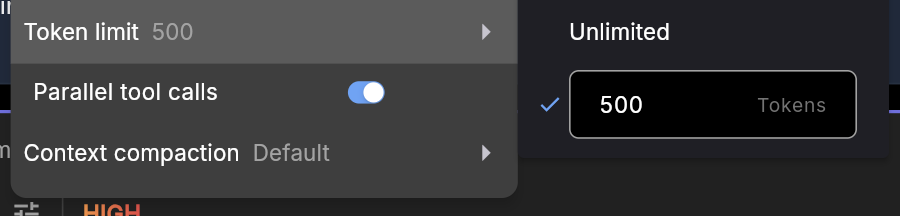
The screenshot shows an example limit of 500 tokens, not a recommended budget for every task.
Pair the limit with a clear stopping point in your brief: “Prepare the storyboard and stop for approval before generating videos.” The setting controls the allowance; the instruction tells the agent which stage you want completed within it.
If the allowance proves too small, inspect the current result and cost breakdown before increasing it. That is more informative than repeatedly restarting the same ambitious task with the same budget.
De-rush once and save a map of the footage
For a series, the preparation stage can serve many edits. Ask an agent to de-rush the source material: review the recordings, identify useful moments and organise what is there.
Have it write a Markdown file in the asset folder containing:
- An overview of the footage and the subjects covered.
- Source filenames or asset references, with useful time ranges.
- Possible episode structures, sections and short-clip ideas.
- Retakes, missing coverage and technical issues.
- Microphone/video alignment information, including which files belong together and any verified offsets.
Be precise about synchronization notes. An offset should identify the two sources, its direction and units, and the point used to check it. If alignment is uncertain, record that uncertainty instead of guessing.
Try this preparation brief:
Review the footage in this folder before making any edits.

Write production-notes.md in the asset folder. Include an overview,
a source list, useful moments with source timecodes, possible episode
sections and short-clip ideas, retakes to avoid, and missing coverage.

Document which microphone recordings match which video files.
Record verified alignment offsets with direction, units and reference
points. Flag uncertain alignment or drift rather than inventing values.

Make the notes usable by another agent in a fresh chat.
Do not assemble the final videos yet.
Then reference that file when starting each deliverable. A footage map gives the next agent a useful place to begin; it should still inspect the relevant clips and verify edit points.
Clear filenames help too. episode03_cameraA_take02.mp4 and episode03_lavalier.wav tell the agent more than DSC_1842.mp4. Names can narrow the search before video analysis, but they cannot establish what was actually said or prove that two recordings are synchronized.
Keep chats focused, while batching short edits when useful
Use one chat per substantial episode or video. Carry its revisions in that conversation, and open a new one when you move to a different deliverable.
Long chats accumulate discarded ideas, tool results and unrelated decisions. Eventually, context compaction has to summarise that history, which can add waiting time. A focused chat makes it easier to give the agent the information needed for the current task.
You do not need a separate chat for every tiny output. Asking for ten short edits at once can work well when they share the source material, style and brief. Give each its own timeline so you can review the results separately.
For example:
Read production-notes.md and create ten short clips from the strongest self-contained moments in this footage. Use the same caption style and vertical format, with one timeline per clip. Avoid repeating the same point across several clips.
Our Tellers Basics production walkthrough shows a related workflow: the same tutorial rushes became a batch of twelve social shorts.
Split the work into separate chats when the briefs diverge or one clip develops a long revision history.
Give a stronger model a clean handoff
If a task is going in circles, changing models is only part of the fix. A stronger model needs the current goal and useful evidence, not every rejected attempt.
Before moving up, ask the existing agent for a short handoff:
Prepare a concise handoff for a fresh chat.

Include the goal, relevant asset references, production-notes.md,
the current timeline, approved decisions, and the exact unresolved
problem. Distinguish verified facts from assumptions.

Summarise failed approaches only when they explain what to avoid.
Do not copy the whole conversation.
Save that handoff, start a new chat, select the stronger intelligence level and provide the relevant references. Check that the new agent can access them before asking it to continue.
This is especially useful after a long, confused exchange. For a short conversation that is progressing well, there is no need to reset everything just because you want more reasoning. Changing models or context can affect cache reuse, so avoid repeatedly switching settings without a purpose.
Leave parallel tool calls enabled
Parallel tool calls are enabled by default. They let the agent run independent operations together instead of waiting for each one to finish before starting the next.
That can shorten execution and reduce the number of intermediate LLM turns. It can also improve the use of cached context, reducing agent costs. The savings depend on the actual workflow and model; parallel execution does not make individual video generations free or cheaper by itself.
The underlying idea of prompt caching is to reuse previously processed, matching context. It can reduce input-processing cost and latency. Keeping a stable setup helps preserve that opportunity.
Independent scene generations can run together. A video that depends on an approved storyboard still needs that approval first.
Approve still images before generating motion
For generative video, start with a storyboard timeline containing one static image per scene. Review the story, composition, visual consistency and intended timing before turning the scenes into videos.
This catches decisions that are expensive to discover after animation: the opening is wrong, a scene adds nothing, the product is too small, or the sequence needs a different ending.
Be explicit about models during exploration. Ask for lower-cost options such as Pruna image/video models or a suitable Wan video model. Once the direction works, switch to a model such as Seedance 2.5 for the shots that benefit from it. Compare the available options for the operation you need; model families contain different capabilities and prices.
Build a storyboard timeline for this video, using one static image
per scene. Use a low-cost Pruna image model for exploration.

Include each scene's intended duration and motion in the notes.
Do not generate video yet. Stop for my review of the sequence.

After approval, animate only the approved scenes. Use an economical
Pruna or Wan video model for motion tests, then Seedance 2.5 for
selected final shots if needed. Reuse the approved references.
Changing generation models can change the look. Keep the approved references, but review the result for continuity instead of assuming that a model switch will preserve every detail.
If the cheaper result already works, keep it. If you know your preferred model gets you to the result faster, use it from the start. Our Pruna overview explains why inexpensive, responsive models are useful during creative exploration.
Turn a successful format into reusable instructions
The first time you make a format, it may take ten or more prompts to get the structure, pacing and visual treatment right. That exploration becomes useful material for the next project.
Once you are happy, ask Tellers to create a specialised agent for the use case, or simply write the instructions to reuse next time:
Create a specialised agent for this format, or give me a reusable
instruction set I can paste into a new chat.

Extract the final decisions from this conversation: required inputs,
structure, pacing, captions, audio, output format and review checks.
Reference the approved timeline as an example.

Keep the instructions pragmatic. Omit rejected ideas and details
that apply only to this particular episode.
A reusable format should say what must stay consistent and what the next brief can change. “Use the approved caption style” can carry forward; the previous episode’s title and source timecodes usually should not.
For individual revisions, be equally specific: “Keep the opening and music; shorten the second section and replace its final shot.” Our guide to clearer AI video prompts gives more examples of expressing editorial intent.
Choose a workflow you can keep using
For a series made from existing footage: prepare the notes once, open focused chats for episodes, batch simple shorts when appropriate, and reuse the format that works.
For generated video: decide the sequence with stills, approve the direction, then spend on motion. Use cheaper models to explore when that helps, or your preferred models throughout when speed matters more.
Track both tokens and the time it takes to reach an approved edit. The right setup is the one that fits your budget and lets you keep making videos.
Open Tellers, set the token limit for your next task, and use /cost-breakdown after the first useful result.
Frequently asked questions
Does Slow mode halve the cost of the whole video?
No. The 50% reduction applies to LLM token pricing for the agent. Image generation, video generation and other tool operations have their own costs. Use /cost-breakdown to see the agent and tool portions of a chat.
Should I start a new chat for every short?
Not necessarily. Ten short edits from the same footage and brief can be one batch, each in its own timeline. Use separate chats for substantial episodes, different briefs or edits that develop long individual revision histories.
Should I always use the cheapest settings?
No. If waiting and repeated corrections cost you more than generation, Ultra Fast response speed, high intelligence and your preferred generation model can be the more practical choice. Compare the total cost and time needed to reach an approved result.